As a programmer, I'm very particular about the tools I use. In college I got used to writing code using Vi, an antiquated command line only text editing program. To this day I still use Vi to occassionally edit text files or code. Sure, I use a slightly updated version with nice syntax highlighting and windows support, but it is still the same Vi where you could do all of your editing through a strange concoction of keystrokes and key combination. Using Vi, you never had to touch the mouse, which was good in its time since mice might not have been invented yet.
Just as I'm picky about the software tools I use, I'm very picky about the hardware that I use. Particularly keyboards and mice. I've become a very proficient touch typist. I'm frustrated each time I need to change keyboards, because invariably the keyboard maker has done something to "improve" their keyboard which throws off my ability to find the right keys. This comes up because when I arrived for my first day of work, I was greeted by a very, very poor keyboard. The keys didn't have the right clicky-ness feel, they stuck, the layout was all wrong.... I didn't like it and it had to go. When I went searching for a replacement, I realized just how much the tools of the trade have changed. Follow with me as we travel down my keyboard and mouse hall of memories.
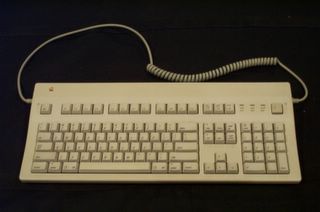
| The MacIntosh IIsi Keyboard and Mouse |
 |
 |
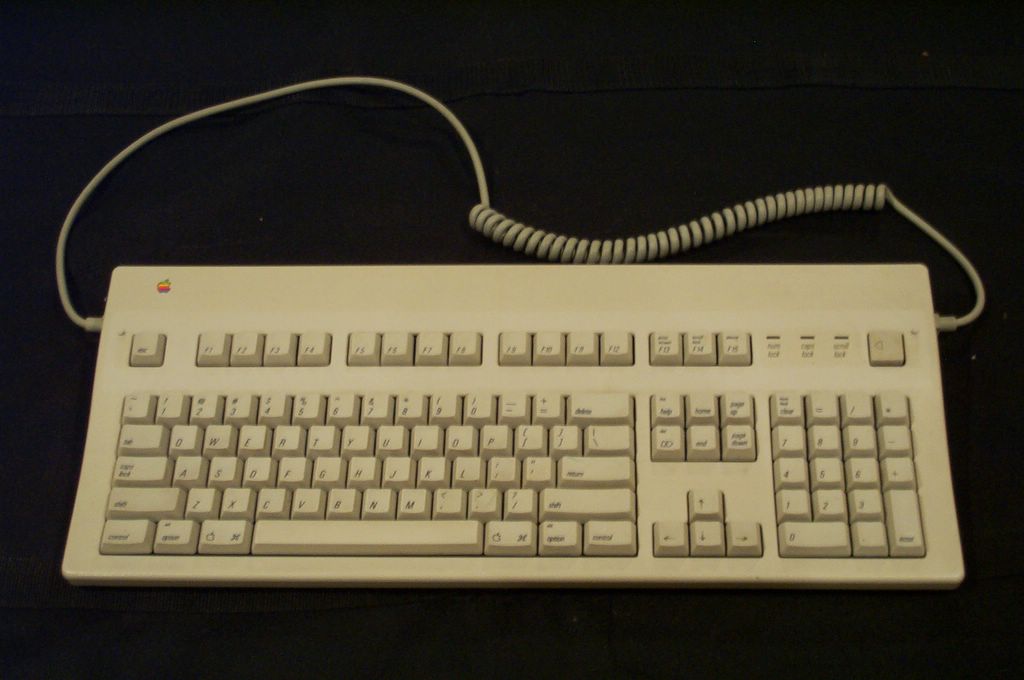
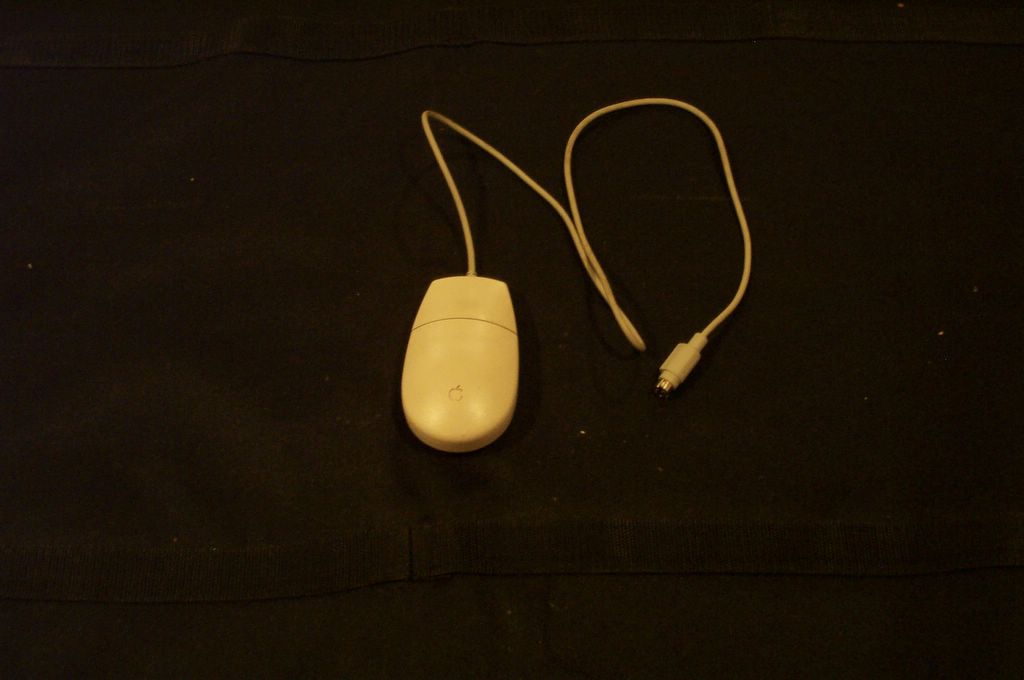
The first keyboard and mouse and I used extensively were on the Mac IIsi we had growin up. Learning to type on this board was a "hunt and peck" affair. I didn't take a typing course until my senior year of high school, but I was quite good at using the "One-Finger-Wonder" technique to stab out what I needed. Mac's were unique, even at that time. One trait that endures even to this day is the one button mouse. Simple, yet utterly effective. Another neat feature of the Mac keyboard was the cabling. I plugged the cord into both sides of the keyboard to show that it had two ports. One port would plug into the back of the PC, and the other was used for the mouse. That's why the cable for the mouse is so short, it only had to run a couple of inches to the keyboard. Brilliant! As wth all keyboards of this time, it weighed about as much as it cost. The Mac keyboard is a good 10 pounds, if not more. All of the keys have a nice weight to them, and make an enticing clicking sound when you press them. Another unique Mac feature is the power button in the upper right hand corner.
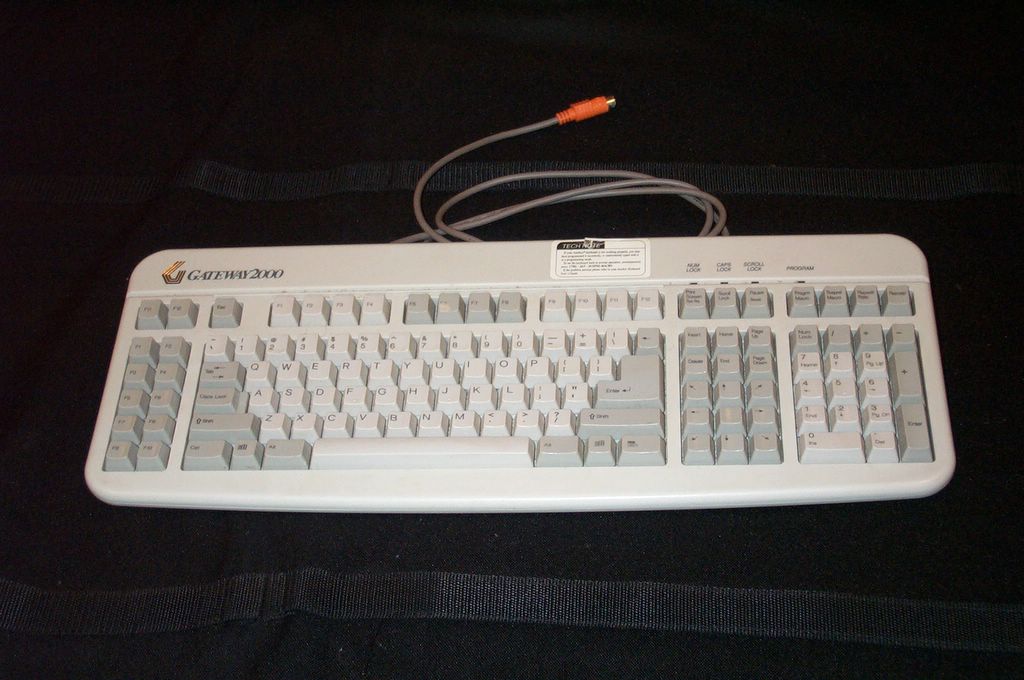
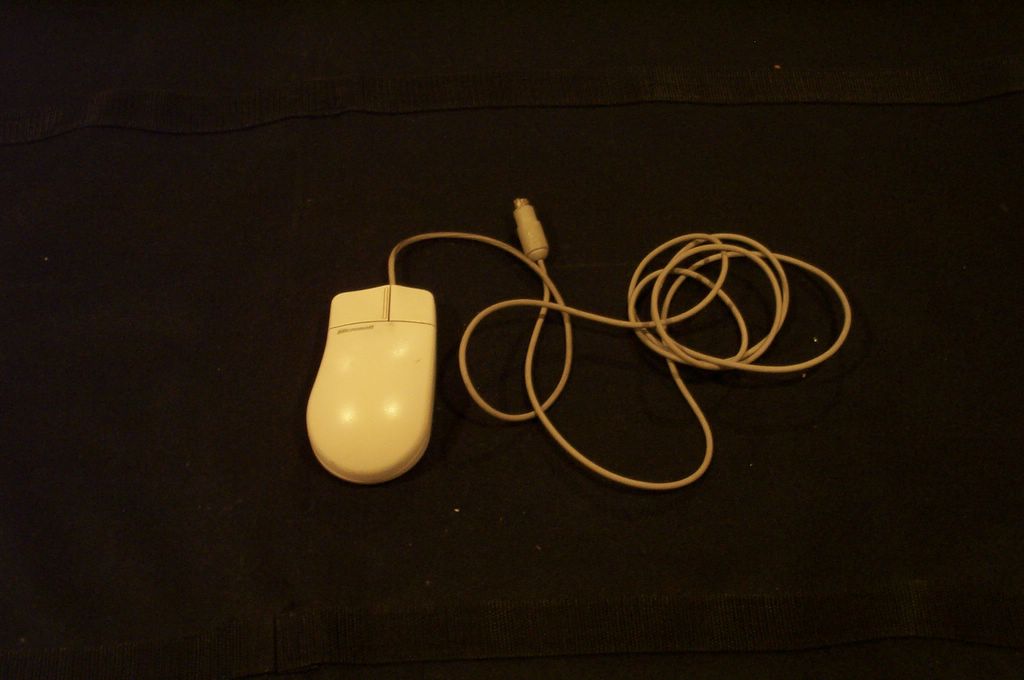
| Gateway AnyKey Keyboard and Mouse |
 |
 |
Upon graduating high school and moving on to college, it was time to get a new PC of my own. I opted for a state of the art Gateway P100 with an Intel Pentium 100MHz processor, 16MB of RAM, and a full 1GB of hard drive space. It came with the Gateway AnyKey keyboard, and a standard two button mouse. The mouse is only interesting in that it had a half-hearted nod to ergonomics. The curved shaped was great.... if you were right handed. Lefties would be totally miffed by this mouse, but I didn't have to worry about that. This keyboard was awesome, and I used it for the longest that I ever used a single keyboard. It had an eight-way arrow pad, which was great for video games. I can't remember what the middle key does between all of the arrows, but I'm sure it had some use. It had not 12 but 24 Function keys (F1-F24). This was a boon when I needed to telnet into the school's UNIX machines and execute some odd-ball command. What really set this keyboard apart, though, was the fact that it was completely prorammable. The keyboard encoder could be reprogrammed on the fly to change any key to function in some other way. Software was available to backup and restore these configurations. Like I said before, I am a Vi user. The school labs all had Sun machines, and Sun machines have a different keyboard layout (sorry for the lack of a photo, but I never OWNED a Sun keyboard). On Sun keyboards, the Control key and CapsLock keys are switched. The Escape key and the tilde/squiggle (`/~) key are switched. And Sun keyboards had a variety of other special "function" keys (Stop and Halt come to mind). When I would back from my labs and go to work on my homework, I could download a new keyboard configuration and use my keyboard just like the Sun ones at the lab. Great! When I was done, I just switched it back to the original layout and I was on my way. I LOVED this keyboard. Unfortunately, it has seen too many years of use, and the keys started to fail. Something messed up the G and H keys, and when keys stop working, it's time for a new keyboard.
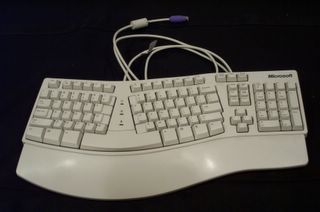
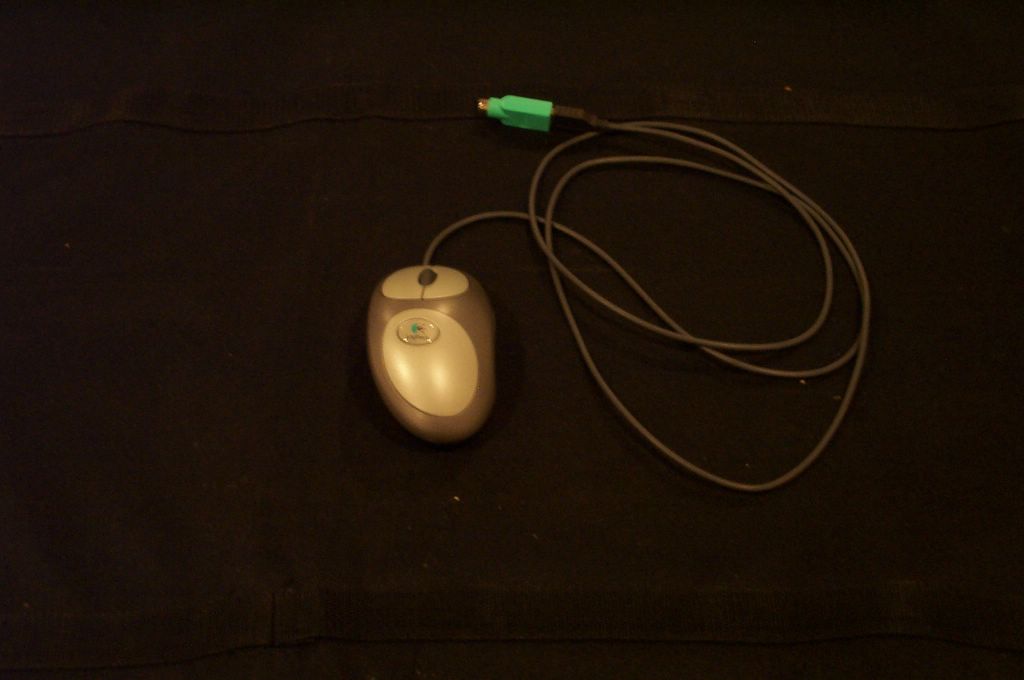
| Ergonomic Keyboard and Optical Mouse |
 |
 |
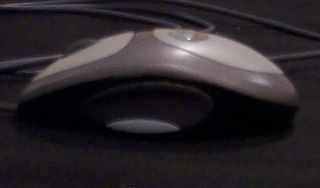
About the time the AnyKey died, the price of optical mice and ergonomic keyboards was falling. Optical mice had the benefit of not using a mouse ball to track movement, but instead detect motion through a tiny light sensor on the bottom of the mouse. It would detect the movement of the pattern under the mouse and move the cursor accordingly. Sun mice worked like this for years, but required a special mouse pad. The new series of mice would work on almost any surface, and you would never worry about cleaning the lint out of your mouse balls again (shiver). Another neat feature was the scroll wheel. This had been around for a while in non-optical mice, but this was the first mouse I had with a scroll wheel. The scroll wheels were a tremendously good idea. They allowed you to quickly scroll up and down a window, such as a web page or word document. No more hunting for the scroll bars. The wheel could also be depressed for a third mouse button. I never really used this feature until later software (Firefox's tabbed browsing) took good advantage of it.
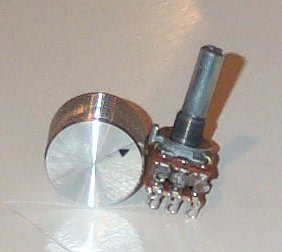
The ergonomic keyboards were a pretty radical change as well. Mind you, I had spent the better part of the last ten years mastering a particular keyboard layout. I was more than a little wary of these strange beasts with their split layout and curved surface. I decided to take the plunge though, and after an adjustment period, found that the layout truly was much more natural. Regular keyboards cause your hands and wrists to be at too much of an strange angle. Your fingers are oriented straigh up and down while your wrists are bent to accomodate the width of your shoulders. This isn't such a problem for occassional PC users, but for someone who spends 8 or more hours a day typing, it can get to be quie a nuissance. I never realized how much so until I went from the ergo keyboard back to a laptop keyboard for work. They really are more comfortable, and only take a week or so of use to get really accustomed to. Still, I lost a lot with this keyboard. I was down 12 function keys, my 8 way arrow pad was down to a four-way cross, and my Insert-Home-Page Up / Delete-End-Page Down keys had been turned on their side.
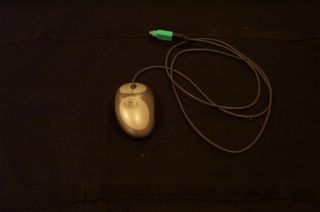
| Dual Optical Logitech Mouse |
 |
 |
I liked my optical mouse, but I wanted more out of it. Enter the Logitech dual optical mouse. It was another right-handers only mouse, and the design really fit my hand well. It featured two motion tracking sensors on the bottom, which eliminated a lot of the jitter you get out of the single optical variety. It also had a handy extra button on the side. This button was configurable, but I liked the default, which was as a back button in your browser. The scroll wheel is still present. I absolutely love this mouse, and use it to this day.
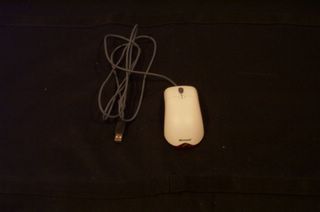
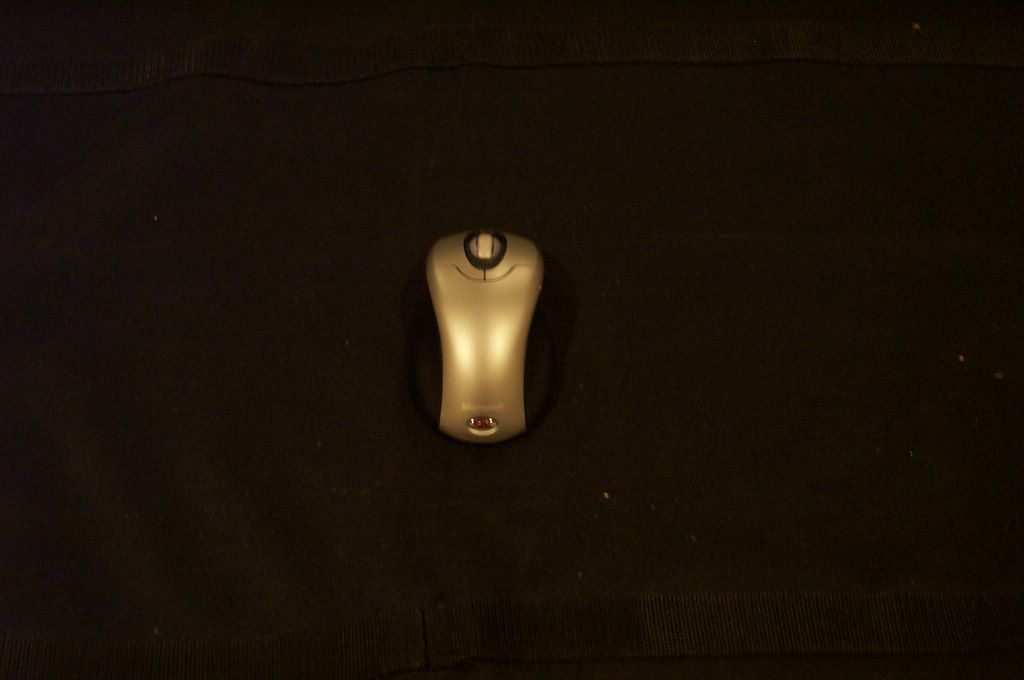
| Microsoft Comfort Wireless Desktop |
 |
 |
Which brings us to my shopping trip today. I was really disappointed when I walked down the aisle at Fry's. All I really wanted was another ergonomic keyboard, and possibly a dual-optical mouse like I had at a cheap price. No chance. The hot feature now is wireless. At my desk, I really don't mind having wires, but there were very few choices for corded keyboards and mice. In addition, finding an ergonomic keyboard with a half-way sane key layout was a real chore. There are so many additional "feature" keys like homepage, e-mail, volume controls, finger-print readers, and so on that I was really put off. Frustrated with Fry's, I went to the local Target. There I found a reduced set of the same things, albeit at much lower prices. I decided I'd give the Microsoft Comfort Wireless Desktop set a try. It was an ergonomic keyboard with a mostly okay layout. Notice that my once mighty 8-way arrow layout is now down to an almost forgotten upside down T tucked at the bottom of the keyboard. My delete key up and swallowed (or did it delete it) the insert key. I'm not entirely upset about that as I found the insert key completely useless. Thankfully, I haven't lost any more function keys (although I do need F-Lock on to get to them), and I still have a full number pad. However, I am now completely surrounded by "helper" stuff around the keyboard. The left side has a zoom slider.... not sure I'll ever get into the routine of using that. It also has hot buttons for e-mail, web browsing, instant messenger, calendar, and my documents folder. Across the top are volume and playback controls, as well as a customizable set of keys. My function keys are now overloaded to offer common editing functions with the F-Lock is turned off. The built-in wrist pad is actually pretty comfortable. After using the keyboard this evening, and to write this post, I have to admit that I'm actually pretty hapy with it. Compared to the old mac keyboard, it is incredibly light, and the lack of cables dangling around does clean up some of the clutter in the room.
The mouse has it's ups and downs. I still prefer my logitech dual-optical mouse over this one, and when the wireless stuff goes to work on Monday, it will make a triumphant return to the mousepad. The wireless optical mouse is no longer bigoted to handed-ness (lefties welcome, Mr. Ned Flanders), but the design doesn't fit my hand quite as well as the logitech does. My back button is gone completely. There was a more expensive version of this setup which included a mouse with both a back, forward, and a couple of other extra buttons on it, but it wasn't worth doubling the price. The one new feature is that the scroll wheel now tips left and right to scroll horizontally. I'm not often faced with horizontal scrolling, so I'm not sure how useful this will be. It can't hurt anything though. One minor nuissance is that the wheel button itself is much more difficult to click. When doing so, it is very easy to lean and end up scrolling rather than clicking.
So there you have it. That is my history with keyboards and mice. I have pictures because I still have all of these old monsters laying around the house. The wireless stuff will travel with me to work on Monday, and I'll be back to hacking bliss!


